Friday, July 11, 2025

How to troubleshoot problems updating Windows?

Windows Update is an essential component of Windows 10, ensuring your system remains secure, stable, and up-to-date with the latest features. However, issues can occasionally arise, preventing updates from installing. This guide provides detailed steps to troubleshoot and resolve Windows Update problems effectively.

Run the Windows Update troubleshooter

If you are using a Windows 10 device, start by running the automated Windows Update troubleshooter in the Get Help app. It will automatically run diagnostics and attempt to fix most of the problems. If you are using an older version of Windows or a mobile device, please skip to General troubleshooting steps.

Run the troubleshooter in Get Help

If the troubleshooter in Get Help app is unable to resolve your issue, select your specific problem from the Most common Windows Update problems section below and follow the provided steps.

Please try the following general troubleshooting steps to help solve the Windows update problem.

Step 1. Run the Windows Update troubleshooter
  • Select Start > Settings > Update & Security.
  • From the left-hand menu, select Troubleshoot, then click on Additional troubleshooters.
  • Under the Get up and running section and select Windows Update and click Run the troubleshooter.
  • Follow the on-screen instructions to complete the process.
 
Step 2: Verify that your device is properly plugged in and connected to the Internet

Make sure that your device is properly plugged into a power source and connected to the internet. A stable internet connection is crucial for downloading and installing updates. Follow these steps to ensure connectivity:
  • Select Start > Settings > Network & Internet > Wi-Fi.
  • Verify your network status. If disconnected, reconnect to your Wi-Fi or Ethernet network.
 
Step 3. Make sure you have Administrator access

Some updates require administrator access. If your account doesn't have administrator access, see how to Create a local user or administrator account in Windows. Or if someone else at home or in your office has an administrator account on your device, try asking them to install the updates.

Step 4. Disconnect external hardware

Remove any external storage devices and drives, docks, and other hardware plugged into your device that aren't needed for basic functionality. Then try to run updates again and see if this resolved your issue. If it didn't, continue to the next tip.

Step 5. Clear the Windows Update Cache

Corrupt update files in the cache can cause errors. Clear the cache by following these steps:

  • Press Win + R, type services.msc, and press Enter.
  • Locate the Windows Update service, right-click it, and select Stop.
  • Navigate to C:\Windows\SoftwareDistribution.
  • Delete all files and folders inside this directory.
  • Go back to the Services window, right-click Windows Update, and select Start.

Step 6. Verify Date and Time settings

Incorrect date and time settings can interfere with Windows Update:

  • Select Start > Settings > Time & language.
  • From the left-hand menu, select Date & time.
  • Enable Set time automatically and If needed, click Sync now under Synchronize your clock.

Step 7. Update third-party drivers

If you've added hardware to your device, check for third-party driver updates and installation instructions on the hardware manufacturer’s website. Update any drivers, then try to run updates again and see if this resolved your issue. If it didn't, continue to the next tip.


Step 8. Free up some space so you can run updates

Make sure that your device has enough space: Your device requires at least 16 GB of free space to upgrade a 32-bit OS, or 20 GB for a 64-bit OS. If your device has a small hard drive, you may need to insert a USB drive to update it.

If your PC is running low on storage, try the techniques at Free up drive space in Windows.


Step 9. Run Windows Update again

Even if you have downloaded some updates, there may be more available. After trying the preceding steps, run Windows Update again by selecting Start > Settings > Update & Security > Windows Update > Check for updates. Download and install any new updates.


Step 10. Restart to apply installed updates

Many updates require you to restart your device. Save your work and close all open applications. Then, select Start > Power , and select either Update and restart


Thursday, March 23, 2023

How to earn money with Honeygain?

 Honeygain is a crowdsourced network company that allows individuals and businesses to earn money by sharing their unused internet bandwidth. The company was founded in 2018 and is based in Lithuania.

The way Honeygain works is that users install the Honeygain app on their devices, such as laptops or smartphones. The app then runs in the background and utilizes the device's unused internet bandwidth to provide a VPN (Virtual Private Network) service to businesses, researchers, and other entities that need access to large amounts of data.

In return for sharing their internet bandwidth, users earn credits that can be exchanged for cash or gift cards. The amount of money that can be earned depends on several factors, such as the amount of internet bandwidth that is shared, the number of devices that are connected, and the demand for data at any given time.

Honeygain emphasizes that user privacy is a top priority and that the app does not access or store any personal data, such as browsing history or passwords. The app also allows users to set a data usage limit to ensure that they do not exceed their internet plan's data cap.

Overall, Honeygain provides a way for individuals and businesses to earn money by sharing their unused internet bandwidth. While the earnings may not be significant, it can be a passive way to earn extra income without requiring any additional effort.


To earn money with Honeygain, you need to follow a few simple steps:

Sign up and install the Honeygain app: First, you need to create a Honeygain account by signing up on their website. Once you have signed up, you need to download and install the Honeygain app on your device.

Connect your devices: Once you have installed the Honeygain app, you can connect multiple devices, such as your laptop or smartphone, to your Honeygain account. This allows you to earn more by sharing your unused internet bandwidth from multiple devices.

Share your internet connection: The Honeygain app runs in the background and uses your unused internet bandwidth to provide VPN services to businesses and researchers. You earn credits for every GB of data that is shared through your device.

Cash out your earnings: You can cash out your earnings once you reach the minimum threshold, which is $20. You can choose to receive your payment via PayPal or select from various gift card options.

It's important to note that the amount of money you can earn with Honeygain depends on several factors, such as the amount of internet bandwidth you share, the number of devices connected, and the demand for data at any given time. Honeygain offers a referral program that allows you to earn additional credits by inviting your friends and family to sign up for the app. Overall, Honeygain provides a passive way to earn extra income without requiring any additional effort on your part.

How to earn money with Fiverr?

  Fiverr is an online marketplace where people can buy and sell digital services. The platform was launched in 2010 and has since grown to become one of the largest freelance marketplaces in the world.

The name "Fiverr" comes from the fact that when the platform was first launched, all services were priced at $5. However, over time, the platform has evolved and now offers services at a variety of price points.

Fiverr allows freelancers to offer a wide range of services, including graphic design, writing, programming, marketing, video editing, and more. Buyers can browse through the various services offered and hire freelancers based on their needs.

One of the unique features of Fiverr is its "gig" system, where freelancers create specific service packages that they offer to buyers. These packages can include different levels of service, add-ons, and delivery times, allowing buyers to choose the option that best suits their needs and budget.

Fiverr also offers a range of tools and features to help freelancers and buyers communicate and collaborate effectively, including messaging, file sharing, and project management tools.

Overall, Fiverr provides a convenient and accessible platform for freelancers to offer their services and for buyers to find and hire the talent they need for their projects.


To earn money on Fiverr, you can start by creating a profile and offering a service that you can provide to clients. Here are the basic steps to get started:

Sign up for a Fiverr account and create a profile: You can create a free account on Fiverr and create a profile that showcases your skills and experience. Your profile should highlight your expertise and include a professional photo and a description of your services.

Create a gig: A "gig" is a specific service that you offer on Fiverr. You can create a gig by defining the service you offer, setting a price, and adding any relevant details such as delivery time, revisions, and extras.

Promote your gig: Once you have created your gig, you can promote it to potential buyers on Fiverr. You can use Fiverr's search and category tools to help buyers find your services, and you can also promote your gigs on social media and other platforms.

Deliver high-quality work: When you get an order from a buyer, make sure to deliver high-quality work on time and communicate with the buyer if there are any issues or revisions needed. This will help you build a positive reputation on Fiverr and increase your chances of getting more orders in the future.

Build your reputation: As you complete more orders and receive positive reviews from buyers, your reputation on Fiverr will grow. This can help you attract more clients and increase your earnings.

Overall, earning money on Fiverr requires a combination of offering high-quality services, promoting your gigs effectively, and building a positive reputation on the platform. With dedication and hard work, you can build a successful freelance career on Fiverr.

Wednesday, September 2, 2020

The CDPUserSvc 20492 service terminated unexpectedly


Yesterday i got call from my customer, that his Acer laptop PC with Windows 10 keep freezing after every 15-20 minutes so i opened Event Viewer and found error message "The CDPUserSvc_20492 service terminated unexpectedly" so i googled a lot and found solution for that:

Firstly open CMD window and run it as administrator. Type the command below:

sc config cdpusersvc type=own

If the issue still insists, try to find OneSyncSvc in Task Manager and disable OneSyncSvc.

Friday, April 3, 2020

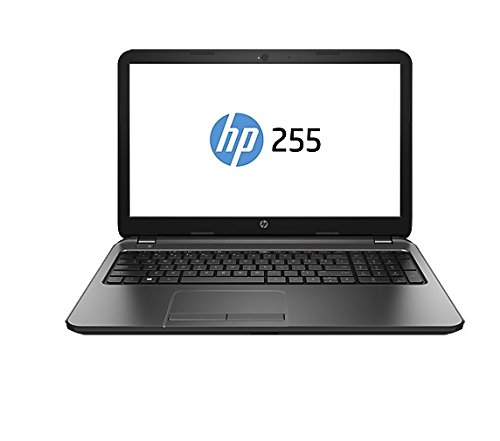
HP 255 G3 laptop is slow and keep freezing

Today i got one HP 255 G3 laptop for repair, because it was extremely slow so i cleaned up old partitions and installed new windows 10. HP 255 G3 - Notebookcheck.net External Reviews
After install it was much better, but then after some updates it was again extremely slow so i tried to update all drivers and updated latest Bios. After bios update is started to use UEFI and said that cant find operating system so i had to install windows again. After install it worked fine for while untill windows updated AMD Radeon graphics driver. I tried many different older drivers, but all had same issues. I downloaded latest AMD driver (2015) from HP product page and that worked fine.

So dont use new AMD drivers for older laptops with AMD graphics!

Thursday, March 19, 2020

Changing the Remote Desktop (RDP) port

Why you want to change your RDP port?

First thing is for security reason because bad guys keep scanning your 3389 port, if its open!
Another reason is, if you have more than one remote machine in your local network, then you can change different ports for different machines.
If you have only one remote machine in your local network, then you dont need to change your internal RDP port you can change external port in router and forward it to your internal port.

Attention!

Make sure that you have also already set the firewall to the new port before you apply the settings below.
For customers who do not want the Remote Desktop to listen to default port 3389: http://support.microsoft.com/kb/306759
  1. Start the Registry Editor
  2. Click the following registry subkey: 
    HKEY_LOCAL_MACHINE\System\CurrentControlSet\Control\TerminalServer\WinStations\RDP-Tcp\PortNumber
  3. Choose Modify in the context menu and select Decimal.
  4. Enter the new port number and click OK.
  5. Close the Registry Editor.
The change only goes into effect once the server is restarted. After the restart, the RDP is only accessible via the new port number. Please also notify the support desk if you will be using an alternative port. The support desk can then log in for support without having to ask additional questions.

Tuesday, October 23, 2018

Cannot change default browser from TwinUI

Many users have reported to me that their default browser has changed to Cannot change default browser from TwinUI and they cannot change it back to any other browsers and default programs app just closes.
Here is easy fix just open Windows powershell (you may need to run as administrator) and copy power shell script there.

Get-AppXPackage | Foreach {Add-AppxPackage -DisableDevelopmentMode -Register “$($_.InstallLocation)\AppXManifest.xml”}


Now you can go to Default programs and change it to any other browser.