Tuesday, December 6, 2011

DNS Protection Solution

Background 
The Domain Name System (DNS) is a distributed Internet content service, and primarily realizes the mutual resolution between domain names and IP addresses. Most Internet services rely on the DNS. Therefore, if the DNS is faulty, the addressing on the network fails; consequently, services are severely affected.

Several incidents resulting from DNS attacks in 2009 did great harm to networks, especially the Storm DNS event, which led to network access failures among numerous users in the six provinces in east China; additionally, the Baidu DNS event also brought huge economic loss. How to defend against DNS attacks becomes an urgent security issue for users in various industries. Moreover, how to secure DNSs and deliver DNS protection services is also a challenge for carriers. 

Solution Overview 

There are primarily three types of DNS attacks, namely, DNS flood, DNS cache poisoning, and DNS hijacking. 

In DNS flood, massive domain name resolution requests are sent to the target server; but the domain names to be resolved are invalid. Therefore, resolution timeout occurs during this process due to the excessive requests. For DNS cache poisoning, an illegitimate domain name address is sent to the target DNS server. If the server accepts the illegitimate address, the cache is attacked. Worse still, subsequent replies responded to the domain name requests are under the hacker's control; the browsers and mail servers automatically direct to the illegitimate addresses specified by the DNS server. DNS hijacking includes host file modification, SPI chain injection, and BHO plug-in. Although not all these are implemented during DNS processing, users may fail to obtain the correct addresses or content due to these factors. 

Based on years' experience in DNS protection and profound understanding of user demands, Huawei launches a comprehensive DNS protection solution by integrating DDoS defense and UTM features. 

In this solution, the anti-DDoS device defends against DNS flood and DNS cache poisoning through source IP address authentication, attack fingerprint learning, and traffic dynamic baseline. Meanwhile, the UTM device divides the DNS into external area and internal area, which effectively promotes the security and reliability of the DNS server. Moreover, the IPS function of the UTM device detects the vulnerabilities of DNS protocols to defend against intrusion into the DNS.
Solution Features 
Hierarchical defense 

To defend against various DDoS attacks on the DNS, Huawei DNS protection solution adopts hierarchical defense technologies and implement filtering layer by layer, ensuring that all traffic reaching the DNS is normal service traffic. 

High-performance hardware platform

Huawei UTM device adopts carrier-class hardware platform and multi-core processing system, and delivers high-performance functions with sound reliability, including firewall and IPS. These features perfectly satisfy the requirements of the DNS on diversified performance indicators such as network throughput.
Huawei anti-DDoS device provides users with 2G to 80G anti-DDoS performance, realizing efficient and effective DDoS defense in different networking environments for various users.

Easy-to-use management operation system

Huawei DNS protection solution equips users with easy-to-use management operation system, including graphic device and policy configuration interface. In addition, it also provides customized attack and performance reports for users.

Furthermore, Huawei DNS protection solution can serve as a platform for value-added security operation services, which enables differentiated defense policies for DNSs and realizes individualized value-added security services.

Thursday, December 1, 2011

How to create a bootable Windows 7 USB flash drive

The USB flash drive has replaced the floppy disk drive as the best storage medium for transferring files, but it also has its uses as a replacement for CDs and DVDs. USB drives tend to be higher in capacity than disc media, but since they are more expensive, they cannot (yet) really be used as a replacement. There are reasons why you would, however, choose a USB device over a DVD disc, and bootable software is definitely one of them. Not only is it faster to copy data such as setup files from a USB drive, but during usage the access times are also significantly faster. Therefore, installing something like Windows 7 will work that much faster from a USB drive than from a DVD (and of course, is particularly useful for the PCs without an optical drive; this isn't something we should just leave for the pirates to enjoy).
This guide will show you two different ways to create a USB flash drive that works just like a Windows 7 DVD. In order to follow this guide, you'll need a USB flash drive with at least 4GB of free space and a copy of the Windows 7 installation disc.

Windows 7 USB DVD Download Tool

You are normally given this tool when you purchase from the online Microsoft Store.windows_7_usb_1.png
The easiest way to turn a USB flash drive into a bootable Windows 7 installer is by using the tool Microsoft offers, cunningly named the Windows 7 USB/DVD Download Tool. To get started, download the installer [exe] from Microsoft.com and follow the basic steps to put it onto your computer; you can put it on the computer you plan to install Windows 7 on or another one, it doesn't matter.
windows_7_usb_2.png
Once it is installed, it should create an icon on your desktop, so double-click that to open. If you can't find it, use the search function in the Start Menu with a keyword like "USB." Launching it should give you the above screen, and step one is to find the Windows 7 .ISO file. The tool only accepts .ISO images, so we recommend that you convert yours if it's in a different DVD image format.
windows_7_usb_3.png
Step two is straightforward: simply choose USB device.
windows_7_usb_4.png
In step three, all you have to do is make sure that you are choosing the correct USB device. If you have other data on the device, move it to your hard drive, another USB device, or somewhere else before proceeding.
windows_7_usb_5.png
The tool will prompt you if it detects data on the device. Once your data is backed up elsewhere, click Erase USB Device.
windows_7_usb_6.png
You will get another prompt warning you that all the data will be wiped. Click Yes to continue.
windows_7_usb_7.png
The format will be very quick, while the copying of the files will take a little bit more time (about 10 to 15 minutes).
windows_7_usb_8.png
Once the process is complete, you should get the above confirmation message. At this point you can close the tool and use the USB drive to install Windows 7. Remember that you'll have to choose to boot off the USB drive. Before doing so, you may want to open up the USB drive and double click on setup.exe to see if everything looks okay. If you want to be able to do this manually, see the next section, and if you want to be able to install any edition of Windows 7, skip to the section after that.

Manual Creation

windows_7_usb_10.png
Maybe you don't like that Microsoft violated the GPL with the first version of the above tool (the company has since GPLed the code), or you're old-school and just love using the command prompt. Regardless of what your reasons are for creating a bootable Windows 7 USB drive manually, we have the scoop on how to do it. First, open the command prompt (if you use UAC make sure to right click it and choose "Run as administrator"), type "diskpart" without the quotes, and hit enter. You can also get here by simply typing "diskpart" without the quotes into the Start Menu and hitting enter.
windows_7_usb_11.png
Now type "list disk" without the quotes and hit enter. Take a look at the Size column and figure out which disk number your USB drive is. Ours is number 1, so we're going to type "select disk 1" without the quotes and hit enter. Now we're going to wipe it by typing "clean" without the quotes and hitting enter (make sure to do a backup of the contents if you haven't already).
windows_7_usb_12.png
At this point we want to prepare the USB drive for the files and make sure it is bootable. Type "create partition primary" without the quotes and hit enter. Then type "select partition 1" without the quotes and hit enter. Next type "active" without the quotes and hit enter. Finally, type "format fs=fat32" without quotes and hit enter (if you choose to use ntfs, you'll later have to run the "Bootsect.exe /nt60 G:" command to put boot manager compatible files onto your USB flash drive to make it a bootable device). This one will take a while, so go grab a snack, we'll wait. When that's done, type "assign" without the quotes and hit enter (this will assign a new drive letter to the USB flash drive).
windows_7_usb_13.png
An AutoPlay window like the one above will appear. Remember the drive letter (in our case it is H:\), close the window, type "exit" without the quotes and hit enter. If you are working with an .ISO image, the best way to do this last part is to mount the file with a program like Virtual Clone Drive. Alternatively, you can extract the files from the .ISO image and simply copy them to the USB drive, but since we've been using the command prompt up to this point, we'll show you how to do the last step with it as well.
windows_7_usb_14.png
If you don't have the command prompt open, open it with administrative privileges, type "xcopy f:*.* /s/e/f hg:" without the quotes and hit enter. Note that you will likely have to replace "f:" with the drive letter for your Windows 7 DVD and "g:" with the drive letter for your USB flash drive. Don't worry if install.wim takes a while to copy: it's easily the biggest file on the disc.

Bonus: install any edition of Windows 7

windows_7_usb_14.png
This is a completely optional step and you only want to do this if you want to be able to choose which edition of Windows 7 to install. In the command prompt, type "del g:\sources\ei.cfg" without the quotes and hit enter (where g:\ is your USB flash drive).
windows_7_usb_15.png
This will make sure that your Windows 7 installer no longer has a specific version of Windows 7 set as the default, and you will be prompted to choose the version you want to install. Remember that while this gives you a more universal Windows 7 installer, you still need to make sure you are choosing the edition that you own, or you will not be able to activate Windows 7 with the key you have obtained.

How to setup a 301 Redirect

The “301 Permanent Redirect” is the most efficient and search engine friendly method for redirecting websites. You can use it in several situations, including:
  • to redirect an old website to a new address
  • to setup several domains pointing to one website
  • to enforce only one version of your website (www. or no-www)
  • to harmonize a URL structure change
There are several ways to setup a 301 Redirect, below I will cover the most used ones:
PHP Single Page Redirect
In order to redirect a static page to a new address simply enter the code below inside the index.php file.
<?php
header("HTTP/1.1 301 Moved Permanently");
header("Location: http://www.newdomain.com/page.html");
exit();
?>
PHP Canonical Redirect
The Canonical 301 Redirect will add (or remove) the www. prefixes to all the pages inside your domain. The code below redirects the visitors of the http://domain.com version to http://www.domain.com.
<?php
if (substr($_SERVER['HTTP_HOST'],0,3) != 'www') {
header('HTTP/1.1 301 Moved Permanently');
header('Location: http://www.'.$_SERVER['HTTP_HOST']
.$_SERVER['REQUEST_URI']);
}
?>
Apache .htaccess Singe Page Redirect
In order to use this method you will need to create a file named .htaccess (not supported by Windows-based hosting) and place it on the root directory of your website, then just add the code below to the file.
Redirect 301 /old/oldpage.htm /new/http://www.domain.com/newpage.htm
Apache .htaccess Canonical Redirect
Follow the same steps as before but insert the code below instead (it will redirect all the visitors accessing http://domain.com to http://www.domain.com)
Options +FollowSymlinks
RewriteEngine on
rewritecond %{http_host} ^domain.com [nc]
rewriterule ^(.*)$ http://www.domain.com/$1 [r=301,nc]
ASP Single Page Redirect
This redirect method is used with the Active Server Pages platform.
<%
Response.Status="301 Moved Permanently"
Response.AddHeader='Location','http://www.new-url.com/'
%>
ASP Canonical Redirect
The Canonical Redirect with ASP must be located in a script that is executed in every page on the server before the page content starts.
<%
If InStr(Request.ServerVariables("SERVER_NAME"),"www") = 0 Then
Response.Status="301 Moved Permanently"
Response.AddHeader "Location","http://www."
& Request.ServerVariables("HTTP_HOST")
& Request.ServerVariables("SCRIPT_NAME")
End if
%>

42 Web Design Mistakes You Should Avoid

There are several lists of web design mistakes around the Internet. Most of them, however, are the “Most common” or “Top 10” mistakes. Every time I crossed one of those lists I would think to myself: “Come on, there must be more than 10 mistakes…”. Then I decided to write down all the web design mistakes that would come into my head; within half an hour I had over thirty of them listed. Afterwards I did some research around the web and the list grew to 43 points.
The next step was to write a short description for each one, and the result is the collection of mistakes that you will find below. Some of the points are common sense, others are quite polemic. Most of them apply to any website though, whether we talk about a business entity or a blog. Enjoy!
1. The user must know what the site is about in seconds: attention is one the most valuable currencies on the Internet. If a visitor can not figure what your site is about in a couple of seconds, he will probably just go somewhere else. Your site must communicate why I should spend my time there, and FAST!
2. Make the content scannable: this is the Internet, not a book, so forget large blocks of text. Probably I will be visiting your site while I work on other stuff so make sure that I can scan through the entire content. Bullet points, headers, subheaders, lists. Anything that will help the reader filter what he is looking for.
3. Do not use fancy fonts that are unreadable: sure there are some fonts that will give a sophisticated look to your website. But are they readable? If your main objective is to deliver a message and get the visitors reading your stuff, then you should make the process comfortable for them.
4. Do not use tiny fonts: the previous point applies here, you want to make sure that readers are comfortable reading your content. My Firefox does have a zooming feature, but if I need to use on your website it will probably be the last time I visit it.
5. Do not open new browser windows: I used to do that on my first websites. The logic was simple, if I open new browser windows for external links the user will never leave my site. WRONG! Let the user control where he wants the links to open. There is a reason why browsers have a huge “Back” button. Do not worry about sending the visitor to another website, he will get back if he wants to (even porn sites are starting to get conscious regarding this point lately…).
6. Do not resize the user’s browser windows: the user should be in control of his browser. If you resize it you will risk to mess things up on his side, and what is worse you might lose your credibility in front of him.
7. Do not require a registration unless it is necessary: lets put this straight, when I browse around the Internet I want to get information, not the other way around. Do not force me to register up and leave my email address and other details unless it is absolutely necessary (i.e. unless what you offer is so good that I will bear with the registration).
8. Never subscribe the visitor for something without his consent: do not automatically subscribe a visitor to newsletters when he registers up on your site. Sending unsolicited emails around is not the best way to make friends.
9. Do not overuse Flash: apart from increasing the load time of your website, excessive usage of Flash might also annoy the visitors. Use it only if you must offer features that are not supported by static pages.
10. Do not play music: on the early years of the Internet web developers always tried to successfully integrate music into websites. Guess what, they failed miserably. Do not use music, period.
11. If you MUST play an audio file let the user start it: some situations might require an audio file. You might need to deliver a speech to the user or your guided tour might have an audio component. That is fine. Just make sure that the user is in control, let him push the “Play” button as opposed to jamming the music on his face right after he enters the website.
12. Do not clutter your website with badges: first of all, badges of networks and communities make a site look very unprofessional. Even if we are talking about awards and recognition badges you should place them on the “About Us” page.
13. Do not use a homepage that just launches the “real” website: the smaller the number of steps required for the user to access your content, the better.
14. Make sure to include contact details: there is nothing worse than a website that has no contact details. This is not bad only for the visitors, but also for yourself. You might lose important feedback along the way.
15. Do not break the “Back” button: this is a very basic principle of usability. Do not break the “Back” button under any circumstance. Opening new browser windows will break it, for instance, and some Javascript links might also break them.
16. Do not use blinking text: unless your visitors are coming straight from 1996, that is.
17. Avoid complex URL structures: a simple, keyword-based URL structure will not only improve your search engine rankings, but it will also make it easier for the reader to identify the content of your pages before visiting them.
18. Use CSS over HTML tables: HTML tables were used to create page layouts. With the advent of CSS, however, there is no reason to stick to them. CSS is faster, more reliable and it offers many more features.
19. Make sure users can search the whole website: there is a reason why search engines revolutionized the Internet. You probably guessed it, because they make it very easy to find the information we are looking for. Do not neglect this on your site.
20. Avoid “drop down” menus: the user should be able to see all the navigation options straight way. Using “drop down” menus might confuse things and hide the information the reader was actually looking for.
21. Use text navigation: text navigation is not only faster but it is also more reliable. Some users, for instance, browse the Internet with images turned off.
22. If you are linking to PDF files disclose it: ever clicked on a link only to see your browser freezing while Acrobat Reader launches to open that (unrequested) PDF file? That is pretty annoying so make sure to explicit links pointing to PDF files so that users can handle them properly.
23. Do not confuse the visitor with many versions: avoid confusing the visitor with too many versions of your website. What bandwidth do I prefer? 56Kbps? 128Kbps? Flash or HTML? Man, just give me the content!
24. Do not blend advertising inside the content: blending advertising like Adsense units inside your content might increase your click-through rate on the short term. Over the long run, however, this will reduce your readership base. An annoyed visitor is a lost visitor.
25. Use a simple navigation structure: sometimes less is more. This rule usually applies to people and choices. Make sure that your website has a single, clear navigation structure. The last thing you want is to confuse the reader regarding where he should go to find the information he is looking for.
26. Avoid “intros”: do not force the user to watch or read something before he can access to the real content. This is plain annoying, and he will stay only if what you have to offer is really unique.
27. Do not use FrontPage: this point extends to other cheap HTML editors. While they appear to make web design easier, the output will be a poorly crafted code, incompatible with different browsers and with several bugs.
28. Make sure your website is cross-browser compatible: not all browsers are created equal, and not all of them interpret CSS and other languages on the same way. Like it or not, you will need to make your website compatible with the most used browsers on the market, else you will lose readers over the long term.
29. Make sure to include anchor text on links: I confess I used to do that mistake until some time ago. It is easier to tell people to “click here”. But this is not efficient. Make sure to include a relevant anchor text on your links. It will ensure that the reader knows where he is going to if he clicks the link, and it will also create SEO benefits for the external site where the link is pointing.
30. Do not cloak links: apart from having a clear anchor text, the user must also be able to see where the link is pointing on the status bar of his browser. If you cloak your links (either because they are affiliate ones or due to other reasons) your site will lose credibility.
31. Make links visible: the visitor should be able to recognize what is clickable and what is not, easily. Make sure that your links have a contrasting color (the standard blue color is the optimal most of the times). Possibly also make them underlined.
32. Do not underline or color normal text: do not underline normal text unless absolutely necessary. Just as users need to recognize links easily, they should not get the idea that something is clickable when in reality it is not.
33. Make clicked links change color: this point is very important for the usability of your website. Clicked links that change color help the user to locate himself more easily around your site, making sure that he will not end up visiting the same pages unintentionally.
34. Do not use animated GIFs: unless you have advertising banners that require animation, avoid animated GIFs. They make a site look unprofessional and detract the attention from the content.
35. Make sure to use the ALT and TITLE attributes for images: apart from having SEO benefits the ALT and TITLE attributes for images will play an important role for blind users.
36. Do not use harsh colors: if the user is getting a headache after visiting your site for 10 consecutive minutes, you probably should pick a better color scheme. Design the color palette around your objectives (i.e. deliver a mood, let the user focus on the content, etc.).
37. Do not use pop ups: this point refers to pop ups of any kind. Even user requested pop ups are a bad idea given the increasing amount of pop blockers out there.
38. Avoid Javascript links: those links execute a small Javascript when the user clicks on them. Stay away from them since they often create problems for the user.
39. Include functional links on your footer: people are used to scrolling down to the footer of a website if they are not finding a specific information. At the very least you want to include a link to the Homepage and possibly a link to the “Contact Us” page.
40. Avoid long pages: guess what, if the user needs to scroll down forever in order to read your content he will probably just skip it altogether. If that is the case with your website make it shorter and improve the navigation structure.
41. No horizontal scrolling: while some vertical scrolling is tolerable, the same can not be said about horizontal scrolling. The most used screen resolution nowadays is 1024 x 768 pixels, so make sure that your website fits inside it.
42. No spelling or grammatical mistakes: this is not a web design mistake, but it is one of the most important factors affecting the overall quality of a website. Make sure that your links and texts do not contain spelling or grammatical mistakes.

Wednesday, November 30, 2011

9 Things You Need to Control

When building or managing a website, it almost goes without saying that you need to be in control.  You need to be able to make changes to certain elements if you home to optimize the website properly. Let’s take a look at nine items you should be sure are firmly within your control when you start optimizing a website. And we’re not just talking search engine optimization here.  Think broader than that.  Think of truly building a better, more useful website, for both the engines and your visitors.
Rel=canonical
Being able to tell the engine which version of your URL you’d like to have attributed as the original is pretty useful.  This handy command can help you build value on the version of the URL that matters most to you, and help combine value attributed to many version of the URL into one location, helping boost the rank of that one, original version of the URL.
The tough part here is usually getting the code installed on each page, and of course, each instance needs to point to one selected URL for this to work.  We’d rather you didn’t use the rel=canonical to cover issues where your CMS needs work.  If the CMS is causing instances of duplicate URLs to occur, you should fix the problem.  We see increasing usage of the rel=canonical across huge numbers of pages on large websites.  While we don’t really like this, either, we can work with it, as we understand the need to balance the workload and the returns.
The bottom line, though, remains that you need to be able to manage the rel=canonical, and if you don’t have control over when its deployed, which URLs they point to and when it is used, you need to work it out.
Robots.txt
Seems like a no-brainer, this one, but so many websites remain without a robots.txt file.  In some cases it’s a purely missed opportunity, or the site owner is unaware of what a robots.txt file is.  In other cases, though, it’s the inability to place a file on the root of your domain.
Regardless of the blocker, the robots.txt file is one of the most important files you can place on a web-server.  Given it is the location search crawlers reference to understand how to interact with the website, it’s a pretty powerful document.  If you do not have access to place your robots.txt in the correct location, you need to understand why this control is lacking.  Then solve the problem.
Sitemap.xml
This is another file missing from a huge number of websites today.  Another important file the search crawlers look for.  One that is referenced inside the robots.txt mentioned above, and one which can help get more of your pages into the search index.  Overall, it’s almost as important as the robots.txt file, and if you cannot place these files in a location the crawlers can find, you need to fix this issue.
This file typically lives on the root of the domain, but for larger websites, where multiple files may exist to capture all of the URLs present, maybe only a sitemap directory file is on the root.  Whichever your case, it’s important he crawlers can find it, and if you cannot access the root on your server to place files there, it’s a missed opportunity.
Rich Snippets
Marking up your content has been around for a few years now, and with the launch earlier this year ofwww.schema.org, the major engines have made a clear statement there is value in marking up your content.  By embedding these elements in your page code, we can extract information more accurately and use that information to provide increasingly richer search results.  You are credited as the source for the data used.  This is important work for sites seeking to differentiate themselves from the pack as we move into 2012.
Websites need to balance the future value versus the workload to implement, and still need to keep in mind that implementing these elements won’t immediately increase rankings.  This works helps us better understand relevancy.
What’s important here is planning for the work and ensuring you have buy in across your organization.
Title, Description, Alt Tags, etc.
Managing your title tags, meta descriptions, alt tags, etc. is still important.  All these basic, on page/technical seo factors add up to help us understand what your content is relevant for.  The bottom line with these items is you need to be able to manage them.  If you cannot change these elements on a per-page basis, you lack needed control.  We only mention three here, but you can think of all of them.
That meta description you don’t care to alert and let appear across all you pages?  While writing unique ones for each page won’t suddenly vault your pages to number 1 in the rankings, it can make the difference between a searcher clicking on your result in the search results or not.  Think of the meta description as the “call to action” then, when read by a searcher, tells them why they should click your result.  Better to have your words appearing in our search results than random text we take from the page because your meta description was low quality.
We use the meta description as an example, but the same level of thought should be applied to all of your on page optimization efforts.
Content
This might seem pretty obvious, but with so many website still aggregating content or using article services to build out pages, its worth mentioning.  We talked about how to build good content a little while back and the value of “article-site content”, but we still see websites trying to get ahead in the rankings by basing their websites on a thin content model.  Such sites are often very polished looking, and while may provide value in aggregating a lot of items in one location, they still aren’t adding anything new and unique to the conversation.  A website designed primarily to hold affiliate links that get the user off the website quickly and into a shopping cart on another website is an example of a thin content website, though not the only example.  Affiliate links on a website can be completely useful, but when the content on the site is duplicating that from the original website, there’s simply no reason why that thin content site should outrank the real deal.
Control as applied to content means you can influence the creation of quality content on the website.  If the website is not producing unique, quality content, it won’t last long in the search results.
Verification access
This is pretty straight forward.  You need to be able to place the verification code in place to use webmaster tools.  This oculd be in the form of embedding a tag in the <head> cod eof your webpage, or by a notation added in the DNS for the website.  No matter the option used, you need to have access to make this happen, and if you do not have that access, you lack the control needed to then be able to access some of the richest data about your website online – our webmaster tools data.
UX improvements
If you don’t have a website your visitors love, you’re missing an opportunity.  Get cracking on a user experience review and see where you’re bleeding users.  By staying tuned in to what users like and dislike about your website, you can make the myriad small changes needed to field a UX-winning site.  And if you keep visitors happy, they share you more often with friends, netting you more links.  Visitors are also more likely to come back to you again in the future if they like the site and find it easy to get what they’re after.
It might seem like a small thing, to focus on the user experience, but that UX directly influences the happiness of visitors and the engines can see that in how they reach to your site when they see it ranked in search results.  If you don’t have input on UX improvements, you need to push.  This is an important aspect of optimizing any website.
Social sharing integration
This almost goes without saying, but we still see so many websites not involved socially with their visitors.  Social isn’t going away folks, and while it does take work, skipping social integration is a missed opportunity.  People share what they like with friends.  If you have social sharing icons embedded in your pages, you are much more likely to get shared by visitors.  At the very least, you need to cover this angle.  Get the buttons embedded into your pages so your visitors can share you content with their friends and followers.
The next step is to engage with them socially by having conversations.  That is entirely within your control.
These nine items are not in any order and aren't meant to cover every single thing you need to be in control of, but should at least get you started down the right paths.  And remember, control may mean many things ranging from you making the actual changes to you exerting influence over others who do the work.  In the end, though, if your job is to optimize the website, you need to be in control of the things that influence your website.

Thursday, November 24, 2011

CMPro 5 - Project Cost Management Software

Voyant - Strategisen tiedon visualisointiin

CMPro 5 is a project cost management software designed to productional investments of industry and construction projects to meet their financial objectives. CMPro 5 is modular and can be used for cost estimating, tendering, cost control, income control and unit price contract management

CMPro 5 is designed to manage all stages of the project cost management, including setting of objectives and steering the project to meet the objectives. CMPro 5 is industry-independent. It can be used to manage process equipment, technical systems, as well as, construction business.

CMPro 5 is a tool for all parties involved in an investment project, e.g. project investors, suppliers, contractors, and project management service companies. CMPro 5 is designed to serve a large variety of projects; from new industry investments to repair projects, from construction and real estate projects to installation and system deliveries.

CMPro 5 software installation possibilities:
  • standalone installation to individual PC with SQLBase database
  • Client/Server installation in network environment with Oracle database
    (also MS Terminal Server can be used)
  • ASP service provided by Artemis Finland. CMPro 5 can be used with Web Browser.
CMPro 5 includes application modules for different purposes and users
CMPro 5 is a modular system and can be used for cost estimating and tendering, project cost and income control and unit price contract management.
CMPro 5 system is industry-independent. It can be used to manage process equipment, technical systems, as well as, construction business.
CMPro 5 cost management system is a tool for all parties involved in an investment project, e.g. project investors, suppliers, contractors, and project management service companies. CMPro 5 can be used for managing small and large projects. CMPro 5 can be implemented as a desktop software for one user only or it can be used as a cost management system for managing all projects in a large company.
CMPro 5 modules are
  • Cost Estimating
  • Cost Control
  • Bill of Quantities (Unit Price Contract Management)
  • Income Control
  • Multiproject Reporting
See more information of CMPro modules and technical specifications in CMPro 5 Brochure below.
Note! Cost Estimating module can be implemented either separately or with Cost Control and other modules.

CMPro 5 / Bill of Quantities, downloadable applications
There are 2 freeware applications that can be used together with Bill of Quantity module.
  1. BQ Pricing application is meant to be used as pricing tool by contractors and suppliers, which has been received request for tender created by CMPro
  2. BQ Actual Quantities application is for contractors and suppliers to enter actual quantities during invoicing period in unit price contracts

What is USB?

USB flash drives are devices that are inserted and powered by USB ports. They store information and data that needs to be easily accessed. These devices are portable and convenient for people on the go. USB ports are a common necessity for students as well as business employees or personnel. In addition to convenience, they range in storage capacities from 1GB to 64 GB, so end users are able to store as much information as small computers.
USB Flash Drive and Card Reader
USB connects several devices to a host controller through a chain of hubs. In USB terminology, devices are referred to as functions, because each individual physical device may actually host several functions, such as a webcam with a built-in microphone. The hubs are special-purpose devices that are not officially considered functions. There always exists one hub known as the root hub, which is attached directly to the host controller.
These devices/functions (and hubs) have associated pipes (logical channels). The pipes are synonymous to byte streams such as in the pipelines of Unix. Pipes are connections from the host controller to a logical entity on the device named an endpoint. The term endpoint is also occasionally used to refer to the entire pipe.
These endpoints (and their respective pipes) are numbered 0-15 in each direction, so a device/function can have up to 32 active pipes, 16 into the host controller and 16 out of the controller.
Each endpoint can transfer data in one direction only, either into or out of the device/function, so each pipe is uni-directional. Endpoint 0 is however reserved for the bus management in both directions and thus takes up two of the 32 endpoints — all USB devices are required to implement endpoint 0, so there is always an inward and an outward pipe numbered 0 on any given device.
In these pipes, data is transferred in packets of varying length. Each pipe has a maximum packet length, typically 2n bytes, so a USB packet will often contain something on the order of 8, 16, 32, 64, 128, 256 up to 512 bytes.
The pipes are also divided into four different categories by way of their transfer type:
  • control transfers - typically used for short, simple commands to the device, and a status response, used e.g. by the bus control pipe number 0
  • isochronous transfers - at some guaranteed speed (often but not necessarily as fast as possible) but with possible data loss, e.g. realtime audio or video
  • interrupt transfers - devices that need guaranteed quick responses (bounded latency), e.g. pointing devices and keyboards
  • bulk transfers - large sporadic transfers using all remaining available bandwidth (but with no guarantees on throughput or latency), e.g. file transfers
When a device (function) or hub is attached to the host controller through any hub on the bus, it is given a unique 7 bit address on the bus by the host controller.
The host controller then polls the bus for traffic, usually in a round-robin fashion, so no device can transfer any data on the bus without explicit request from the host controller. Theinterrupt transfers on corresponding endpoints do not actually interrupt any traffic on the bus: they are just scheduled to be queried more often and in between any other large transfers, thus "interrupt traffic" on a USB bus is really only high-priority traffic.
To access an endpoint, a hierarchical configuration must be obtained. The device connected to the bus has one (and only one) device descriptor which in turn has one or moreconfiguration descriptors. These configurations often correspond to states, e.g. active vs. low power mode. Each configuration descriptor in turn has one or more interface descriptors, which describe certain aspects of the device, so that it may be used for different purposes: for example, a camera may have both audio and video interfaces. These interface descriptors in turn have one default interface setting and possibly more alternate interface settings which in turn have endpoint descriptors, as outlined above. An endpoint may however be reused among several interfaces and alternate interface settings.

Host controllers

A USB Series “A” plug
The hardware that contains the host controller and the root hub has an interface geared toward the programmer which is called Host Controller Device (HCD) and is defined by the hardware implementer. In practice, these are hardware registers (ports) in the computer.
At version 1.0 and 1.1 there were two competing HCD implementations. Compaq's Open Host Controller Interface (OHCI) was adopted as the standard by the USB-IF. However, Intel subsequently created a specification they called the Universal Host Controller Interface (UHCI) and insisted other implementers pay to license and implement UHCI. VIA Technologies licensed the UHCI standard from Intel; all other chipset implementers use OHCI. The main difference between OHCI and UHCI is the fact that UHCI is more software-driven than OHCI is, making UHCI slightly more processor-intensive but cheaper to implement. The dueling implementations forced operating system vendors and hardware vendors to develop and test on both implementations which increased cost. During the design phase of USB 2.0 the USB-IF insisted on only one implementation. The USB 2.0 HCD implementation is called the Extended Host Controller Interface (EHCI). Only EHCI can support hi-speed transfers. Each EHCI controller contains four virtual HCD implementations to support Full Speed and Low Speed devices. The virtual HCD on Intel and VIA EHCI controllers are UHCI. All other vendors use virtual OHCI controllers.

Class Codes

The device descriptor of a USB device has a signature that tells what kind of device has been attached to the bus. This signature consists of class code, subclass code and protocol fields. Together, these identify what operating system driver should be used to communicate with the device. Additionally, each USB device interface descriptor contains the same signature fields. The interface signature allows multiple operating system drivers to simultaneously communicate with a single USB device (for example USB device with audio and video interfaces) and they also allow multiple instances of the same driver to communicate with separate interfaces of the same USB device (for example USB ethernet adapter with multiple ethernet ports)
Devices that attach to the bus can be full-custom devices requiring a full-custom device driver to be used, or may belong to a device class. These classes define an expected behavior in terms of device and interface descriptors so that the same device driver may be used for any device that claims to be a member of a certain class. An operating system is supposed to implement all device classes so as to provide generic drivers for any USB device.
Device class codes are decided upon by the Device Working Group of the USB Implementers Forum. If the class applies to the entire device, the class code is assigned to thebDeviceClass field of the device descriptor, and if it is to be set for a single interface on a device, it is assigned to the bInterfaceClass field of the interface descriptor. It is also possible that multiple interfaces of the device are grouped by using an Interface Association Descriptor, in which case the class code is assigned to bFunctionClass fields of the descriptor. Class code is a single byte, so a maximum of 254 different device classes are possible (values 0x00 and 0xFF are reserved). If bDeviceClass is set to 0x00, the operating system will look atbFunctionClass for Interface Association Descriptors and bInterfaceClass for each interface to determine the device class. Each class also optionally supports a SubClass and Protocolsubdefinition. These can be used as the main device classes are continuously revised.
The most used class codes (grouped by assigned class ID) are:[1]
0x00 - Unspecified Class (Device Descriptor) 
The USB device has no assigned class code. The class codes of the device interface descriptors should be used to identify which drivers are supported by the device.
0x01 - Audio Class (Interface Descriptor) 
The interface follows USB audio device class specification. This class code is used by sound card-like devices.
0x02 - CDC / Communication Device Class (Device or Interface Descriptor) 
USB communications device class ("CDC"), used for modems, network cards, ISDN connections, Fax.
0x03 - HID Class / Human Interface Device Class (Interface Descriptor) 
USB human interface device class ("HID"), keyboards, mice, etc.
0x05 - Physical Device Class (Interface Descriptor) 
 ?
0x06 - Still Imaging Class (Interface Descriptor) 
Still image capture device class, identical to the Picture Transfer Protocol as used across USB
0x07 - Printer Class (Interface Descriptor) 
USB printer device class, printer-like devices.
0x08 - Mass Storage Class (Interface Descriptor) 
USB mass storage device class used for flash drives, portable hard drives, memory card readers, digital cameras, digital audio players etc. This device class presents the device as a block device (almost always used to store a file system).
0x09 - Hub (Device Descriptor) 
USB hubs.
0x0A - CDC Data / Communication Device Class Data (Interface Descriptor) 
CDC-Data (Communications Class Device).
0x0B - Smart Card Class (Interface Descriptor) 
Smart card readers.
0x0D - Content Security Class (Interface Descriptor) 
Content Security.
0x0E - Video Class (Interface Descriptor) 
USB video device class, webcam-like devices, motion image capture devices.
0xDC - Diagnostics Device Class (Device or Interface Descriptor) 
Class for diagnostics devices. This class has a single subclass for USB 2.0 compliance testing devices.
0xE0 - Wireless Controller Class (Device or Interface Descriptor) 
Wireless controllers, for example Bluetooth dongles. This class code is usually used only in interface descriptors, only bluetooth subclass allows use in device descriptors.
0xEF - Miscellaneous Class (Device or Interface Descriptor) 
 ?
0xFE - Application Specific Class (Interface Descriptor) 
 ?
0xFF - Vendor Specific Class (Device or Interface Descriptor) 
Custom device class - used to establish that a device or interface does not support any standard device class and requires custom drivers.

USB signaling

Pin numbers (looking at socket)
Pin assignments[2]
PinFunction
 1VBUS (4.75–5.25 volts)
 2D−
 3D+
 4GND
 ShellShield
Mnemonic: Victor Dashes Across Ground-Zero (Vbus , - , + , GND , Shield/Blank)
USB signals are transmitted on a twisted pair of data cables, labelled D+ and D−. These collectively use half-duplex differential signaling to combat the effects of electromagnetic noise on longer lines. D+ and D− usually operate together; they are not separate simplex connections. Transmitted signal levels are 0.0–0.3 volts for low and 2.8–3.6 volts for high.

Transfer modes
USB supports four transfer modes:
  • Control
  • Interrupt
  • Bulk
  • Isochronous

Transfer speed
USB supports three data rates:
  • Low Speed rate of up to 1.5 Mbit/s (187.5 kB/s) that is mostly used for Human Interface Devices (HID) such as keyboards, mice, and joysticks.
  • Full Speed rate of up to 12 Mbit/s (1.5 [MB/s). Full Speed was the fastest rate before the USB 2.0 specification and many devices fall back to Full Speed. Full Speed devices divide the USB bandwidth between them in a first-come first-served basis and it is not uncommon to run out of bandwidth with several isochronous devices. All USB Hubs support Full Speed.
  • Hi-Speed rate of up to 480 Mbit/s (60 MB/s).
Hubs, even Hi-Speed hubs, serving a number of non-hi-speed devices, are likely to divide up a total bandwidth of 12 Mbit/s for such devices, which will slow them down unless the hub has transaction translator for each port. [3]
Though Hi-Speed devices are commonly referred to as "USB 2.0" and advertised as "up to 480 Mbit/s", not all USB 2.0 devices are Hi-Speed. Hi-speed devices typically only operate at half of the full theoretical (60 MB/s) data throughput rate. The maximum rate currently (2006) attained with real devices is about half, 30 MB/s.[4] Most hi-speed USB devices typically operate at much slower speeds, often about 3 MB/s overall, sometimes up to 10-20 MB/s. The USB-IF certifies devices and provides licenses to use special marketing logos for either "Basic-Speed" (low and full) or Hi-Speed after passing a compliancy test and paying a licensing fee. All devices are tested according to the latest spec, so recently-compliant Low Speed devices are also 2.0.
Hi-Speed devices are intended to fall back to the slower data rate of Full Speed when plugged into a Full Speed hub. Hi-Speed hubs have a special function called the Transaction Translator that segregates Full Speed and Low Speed bus traffic from Hi-Speed traffic. The Transaction Translator in a Hi-Speed hub (or possibly each port depending on the electrical design) will function as a completely separate Full Speed bus to Full Speed and Low Speed devices attached to it. This segregation is for bandwidth only; bus rules about power and hub depth still apply.
A hub will have one or more Transaction Translators and there is no standard way to determine the number of transaction translators a hub may have. All low and full speed devices connected to one transaction translator will share the low/full speed bandwidth. This means that hubs can have dramatically different performance depending upon the number of transaction translators and the devices plugged into their ports. e.g. a hi-speed 7 port hub with only 1 transaction translator with 7 low/full speed devices plugged in, will act no differently than a USB 1.1 hub and all devices compete for the same low/full speed bandwidth. If the hub were to have a transaction translator for each of the seven ports, then each device would have all the full/low speed bandwidth available to it and would only compete for the hi-speed bandwidth, which is much greater.

Data encoding

The USB standard uses the NRZI system to encode data, and uses bit stuffing for logic 1 transmission six bits long (put logic 0 after six bits of logic 1; the receiver ignores a 0 followingsix logic 1). Moreover, receiving a block of seven consecutive bits of logic 1 will be signaled as a bit stuffing error at the receiver. The NRZI (non-return to zero, inverted) encoding method does not change the signal for transmission of a logic 1, but it inverts the signal level for transmission of each logic 0.

Mini-USB signaling

USB Mini-A, and -B plugs showing pin numbers (not to scale)
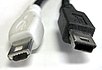
Mini-A plug (left), Mini-B plug (right)
Mini-USB connector pinout
PinFunction
1VBUS (4.4–5.25 V)
2D−
3D+
4ID
5Ground
Most of the pins of a Mini-USB connector are the same as those in a standard USB connector, except pin 4. Pin 4 is called "ID" and, in the Mini-A plug, is connected to ground, but in the Mini-B plug it is not connected. This causes a device supporting USB On-The-Go (with a Mini-AB socket) to initially act as host when connected to a USB Mini-A plug (the "A" end of a Mini-A– Mini-B cable). The Mini-A connector also has an additional piece of plastic inside to prevent insertion into a slave-only (B-only) device.


USB connectors


Connector types

There are several types of USB connectors, and some have been added as the specification has progressed. From the original USB specification:
  • Standard-A plug
  • Standard-A receptacle
  • Standard-B plug
  • Standard-B receptacle
Added in the first engineering change noticed to the USB 2.0 specification:
  • Mini-B plug
  • Mini-B receptacle
Added in the Universal Serial Bus Micro-USB Cables and Connectors Specification:
  • Micro-A plug (white)
  • Micro-AB receptacle (gray)
  • Micro-B plug (black)
  • Micro-B receptacle (black)
Adapters, also from the Universal Serial Bus Micro-USB Cables and Connectors Specification (Note that no other adapters are allowed.):
  • Standard-A receptacle to Micro-A plug
Micro-USB plug
Micro-USB plug
  • "Micro-series USB technology will replace Mini-series USB in OTG products" [1] "Beaverton, OR, 2007-01-04 -- The USB Implementers Forum, Inc. (USB-IF) today announced the completion of the Micro-USB specification, a new connector technology that will replace many of the Mini-series plugs and receptacles currently used in portable products." The Micro-USB plug is rated for 10,000 connect-disconnect cycles. It is about half the height of the mini-USB connector in widespread use today but features a similar width.


Cables and connectors

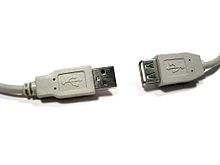
Series "A" plug and receptacle.
Cables have only plugs, and hosts and devices have only receptacles. Hosts have type-A receptacles; devices, if they have receptacles, have type-B. Type-A plugs only mate with type-A receptacles, and type-B with type-B.
The On-the-Go supplement allows a product to be either host or device, with a Micro-AB receptacle that accepts either a Micro-A plug or a Micro-B plug. Micro-A, Micro-B, and Micro-AB connectors are identified easily by color. The plastic inside Micro-A plugs and receptacles is always white, that in Micro-B connectors black, and that in Micro-AB receptacles grey.
There is a limited set of cables allowed by the USB specification. Cables fall into two categories — "detachable" and "captive". All allowed USB cables have one type-A plug, either Standard-A or Micro-A. The other end of a "captive" cable is either not removable or it has a custom connector on the device end. If the cable is "detachable", the other end of the cable must have a type-B plug. There also exists a special adapter cable that has micro-A plug and standard-A receptacle.
Captive USB cable types:
  • Standard-A plug to device.
    This cable may have a custom connector on the device end.
  • Micro-A plug to device.
    This cable is not intended to be removed by the end user of the device.
Detachable USB cable types:
  • Standard-A plug to Standard-B plug.
    This is the most popular cable for connecting USB devices to host.
  • Standard-A plug to Mini-B plug.
    Used to connect older mobile devices to host.
  • Standard-A plug to Micro-B plug.
    Used to connect newer mobile devices to host.
  • Micro-A plug to Micro-B plug.
    Used to connect mobile devices to each other.
  • Micro-A plug to Standard-A receptacle.
    This is a special adapter cable that is allowed to be at most 150 mm long. It is needed in order to allow mobile devices to act as USB hosts for devices which are not using Micro-USB connectors.
Any cable with a receptacle (except the special case above) or with two "A" or two "B" connectors is, by definition, not USB.[6] However, many cable manufacturers make and sell USB-compatible (yet not strictly conforming) extension cables with a Standard-A plug on one end and Standard-A receptacle on the other end. Note that these non-conforming extension cables should not be mixed with conforming cables that contain a small bus-powered hub. Cables with two type A or even two type B plugs are available from more specialist suppliers.
Note that only "full-speed" and "hi-speed" devices use detachable cables. Compliant "Low-speed" devices only use captive cables, because the low-speed specification does not allow for the electrical characteristics of standard detachable USB cables.
The Mini-B, Micro-A, Micro-B, and Micro-AB connectors are used for smaller devices such as PDAs, mobile phones or digital cameras. The Standard-A plug is approximately 4 by 12 mm, the Standard-B approximately 7 by 8 mm, and the Micro-A and Micro-B plugs approximately 2 by 7 mm.
The connectors which the USB committee specified were designed to support a number of USB's underlying goals, and to reflect lessons learned from the varied menagerie of connectors then in service. In particular:
  • The connectors are designed to be robust. Many previous connector designs were fragile, with pins or other delicate components prone to bending or breaking, even with the application of only very modest force. The electrical contacts in a USB connector are protected by an adjacent plastic tongue, and the entire connecting assembly is further protected by an enclosing metal sheath. As a result USB connectors can safely be handled, inserted, and removed, even by a small child. The encasing sheath and the tough moulded plug body mean that a connector can be dropped, stepped upon, even crushed or struck, all without damage; a considerable degree of force is needed to significantly damage a USB connector.
  • It is difficult to incorrectly attach a USB connector. Connectors cannot be plugged-in upside down, and it is clear from the appearance and kinesthetic sensation of making a connection when the plug and socket are correctly mated. However, it is not obvious at a glance to the inexperienced user (or to a user without sight of the installation) which way round a connector goes, so it is often necessary to try both ways.
  • The connectors are particularly cheap to manufacture.
  • The connectors enforce the directed topology of a USB network. USB does not support cyclical networks, so the connectors from incompatible USB devices are themselves incompatible. Unlike other communications systems (e.g. RJ-45 cabling) gender-changers are almost never used, making it difficult to create a cyclic USB network.
  • A moderate insertion/removal force is specified. USB cables and small USB devices are held in place by the gripping force from the receptacle (without the need for the screws, clips, or thumbturns other connectors require). The force needed to make or break a connection is modest, allowing connections to be made in awkward circumstances or by those with motor disabilities.
  • The connector construction always ensures that the external sheath on the plug contacts with its counterpart in the receptacle before the four connectors within are connected. This sheath is typically connected to the system ground, allowing otherwise damaging static charges to be safely discharged by this route (rather than via delicate electronic components). This means of enclosure also means that there is a (moderate) degree of protection from electromagnetic interference afforded to the USB signal while it travels through the mated connector pair (this is the only location when the otherwise twisted data pair must travel a distance in parallel). In addition, the power and common connections are made after the system ground but before the data connections. This type of staged make-break timing allows for safe hot-swapping and has long been common practice in the design of connectors in the aerospace industry.
  • The USB standard specifies relatively low tolerances for compliant USB connectors, intending to minimize incompatibilities in connectors produced by different vendors (a goal that has been very successfully achieved). Unlike most other connector standards, the USB spec also defines limits to the size of a connecting device in the area around its plug. This was done to avoid circumstances where a device complied with the connector specification but its large size blocked adjacent ports. Compliant devices must either fit within the size restrictions or support a compliant extension cable which does.
However, the physical layer is changed in some examples. For example, the IBM UltraPort is a proprietary USB connector located on the top of IBM's laptop LCDs. It uses a different mechanical connector while preserving the USB signaling and protocol. Other manufacturers of small items also developed their own small form factor connector, and a wide variety of these have appeared. For specification purposes, these devices were treated as having a captive cable.
An extension to USB called USB On-The-Go allows a single port to act as either a host or a device - chosen by which end of the cable plugs into the socket on the unit. Even after the cable is hooked up and the units are talking, the two units may "swap" ends under program control. This facility targets units such as PDAs where the USB link might connect to a PC's host port as a device in one instance, yet connect as a host itself to a keyboard and mouse device in another instance. USB On-The-Go has therefore defined two small form factor connectors, the Mini-A and Mini-B, and a universal socket (Mini-AB), which should stop the proliferation of proprietary designs.
Wireless USB is a standard being developed to extend the USB standard while maintaining backwards compatibility with USB 1.1 and USB 2.0 on the protocol level.
The maximum length of a USB cable is 5 meters; greater lengths require hubs [2]. USB Connections can be extended to 50 m over CAT5 or up to 10 km over fiber by using special USB Extender products developed by various manufacturers.


Power supply


Standard

The USB specification provides a 5 V (volts) supply on a single wire from which connected USB devices may draw power. The specification provides for no more than 5.25 V and no less than 4.35 V between the +ve and -ve bus power lines.
Initially, a device is only allowed to draw 100 mA. It may request more current from the upstream device in units of 100 mA up to a maximum of 500 mA. In practice, most ports will deliver the full 500 mA or more before shutting down power, even if the device hasn't requested it or even identified itself. If a (compliant) device requires more power than is available, then it cannot operate until the user changes the network (either by rearranging USB connections or by adding external power) to supply the power required.
If a USB device sees that the data lines of the USB bus have been idle for 3 milliseconds, the device must go into suspend state. Suspended devices are allowed to draw 500 μA. If the device was configured to use more than 100 mA of current, before the device was suspended, and the device was configured as a remote wakeup source, the device is allowed to draw 2.5 mA while suspended. The current limits during suspend are one second averages.
Note that On-The-Go and Battery Charging Specification both add new powering modes to the USB specification.
If a bus-powered hub is used, the devices downstream may only use a total of four units — 400 mA — of current. This limits compliant bus-powered hubs to 4 ports, among other things. Equipment requiring more than 500 mA, hubs with more than 4 ports and hubs with downstream devices using more than four 100 mA units total must provide their own power. The host operating system typically keeps track of the power requirements of the USB network and may warn the computer's operator when a given segment requires more power than is available.